
|

|

|
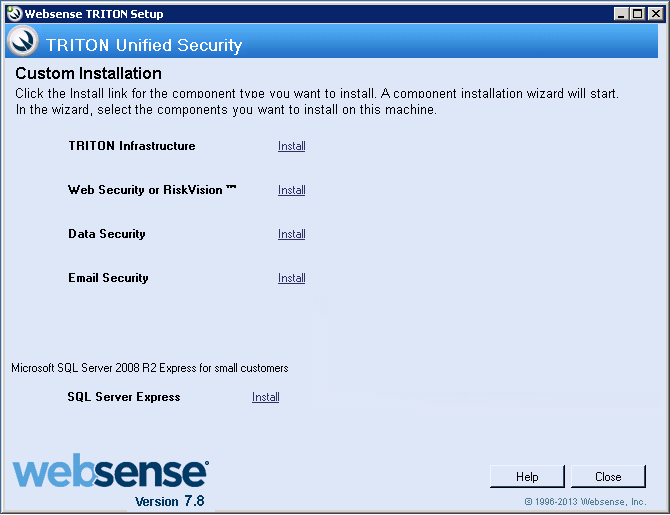
Installing components via the Custom option > Installing Web Security components
|
|
1.
|
|
2.
|
Use the Select Components screen to identify the component or components to install on this machine. As you make your selection, remember that:
|
|
|
|
|
Note that in an appliance-based deployment a Web Security mode appliance running in full policy source mode has Policy Broker already installed and running. In this scenario, there can be only one Policy Broker for the deployment.
|
|
|
Policy Server Connection Screen (Filtering Service, Network Agent, Usage Monitor, TRITON - Web Security, Real-Time Monitor, Web Security Log Server, User Service, DC Agent, Logon Agent, eDirectory Agent, RADIUS Agent, State Server, Multiplexer, Remote Filtering Client Pack, Remote Filtering Server, Linking Service, Sync Service, or Directory Agent)
|
|
|
Policy Broker Connection Screen (Policy Server, Sync Service, or Directory Agent)
|
|
|
Multiple Network Interfaces Screen (if multiple NICs detected)
|
|
|
Active Directory Screen (if installing User Service, DC Agent, or Logon Agent on Windows Server 2008)
|
|
|
Computer Browser Screen (if installing User Service, DC Agent, or Logon Agent on Windows Server 2008 and the Computer Browser service is not running)
|
|
|
Integration Option Screen (Filtering Service)
|
|
|
Select Integration Screen (Filtering Service, to be integrated with a third-party product, or Filtering Plug-In)
|
|
|
Network Card Selection Screen (Network Agent)
|
|
|
SQL Server Native Client Tools (Web Security or Web Security Log Server)
|
|
|
Database Information Screen (Web Security Log Server)
|
|
|
Log Database Location Screen (Web Security Log Server)
|
|
|
Optimize Log Database Size Screen (Web Security Log Server)
|
|
|
Filtering Feedback Screen (Filtering Service or Network Agent)
|
|
|
Directory Service Access Screen (User Service, DC Agent, or Logon Agent)
|
|
|
Remote Filtering Communication Screen (Remote Filtering Server)
|
|
|
Remote Filtering Pass Phrase Screen (Remote Filtering Server)
|
|
|
Filtering Service Information for Remote Filtering Screen (Remote Filtering Server)
|
|
|
Filtering Service Communication Screen (Network Agent, a filtering plug-in, or Linking Service)
|
|
4.
|
On the Installation Directory screen, accept the default installation path, or click Choose to specify another path, and then click Next.
|
|
|
Insufficient RAM prompts a warning message. The installation continues when you click OK. To ensure optimal performance, increase your memory to the recommended amount.
|
|
5.
|
On the Pre-Installation Summary screen, verify the information shown.
|
|
6.
|
Click Next to start the installation. An Installing progress screen is displayed. Wait for the installation to complete.
|
|
7.
|
|
|
|
|
Installing components via the Custom option > Installing Web Security components
|