
|

|

|

|
Installing Forcepoint Email Security in Microsoft Azure > Azure Deployment Steps: Versions 8.5.3 and 8.5.4 > Deploy both Forcepoint Email Security and Forcepoint Security Manager together in the Azure cloud
|
|
1.
|
Log on to the Azure Marketplace, or use a direct link:
|
|
|
|
|
In the Search bar, search for and select Forcepoint Email Security.
|
|
|
Click Create. All other steps are the same as in the Azure portal.
|
|
2.
|
|
3.
|
|
4.
|
Review the terms of use and privacy policy, then click Continue to proceed to the Azure portal.
|
|
5.
|
From the Azure portal, click Create.
|
|
6.
|
|
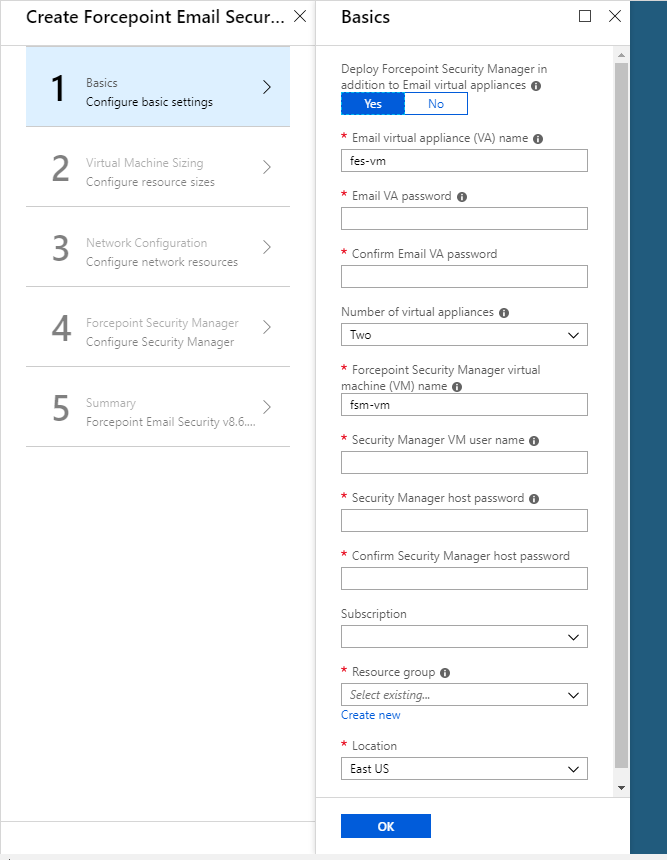
7.
|
In the text field Email virtual appliance (VA) name, enter a name for the Forcepoint Email Security virtual appliance (VA).
|
|
8.
|
In the text fields Email VA password and Confirm Email VA password, enter and confirm the password for connecting to the host.
|
|
9.
|
From the pull-down menu Number of virtual appliances, select the number of VAs to use; between 1 and 8.
|
|
10.
|
In the text field Security Manager virtual machine (VM) name, enter the name of the Security Manager virtual machine (VM).
|
|
11.
|
In the text field Security Manager VM user name, enter the administrator user name of the Security Manager host.
|
|
12.
|
In the text fields Security Manager host password and Confirm Security Manager host password, enter and confirm the administrator password for the Security Manager host.
|
|
13.
|
From the pull-down menu Subscription, select your subscription.
|
|
14.
|
|
15.
|
From the pull-down menu Location, select the location for the VAs and VM.
|
|
16.
|
Click OK.
|
|
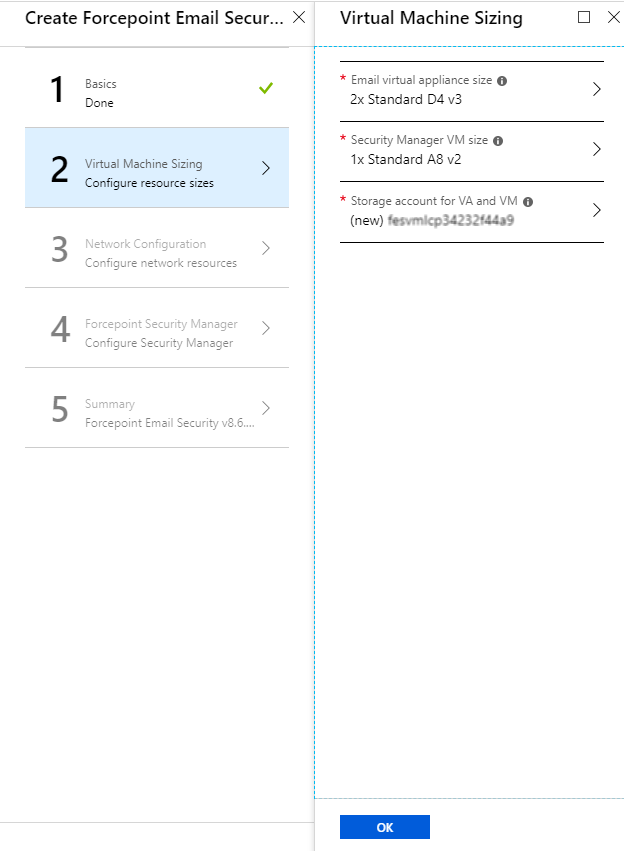
17.
|
From Email virtual appliance size, select the size of the VA you will need based on anticipated email volume, then click Select.
|
|
18.
|
From Security Manager VM size, select the size of the virtual machine you need for Forcepoint Security Manager.
|
|
19.
|
From Storage account for VA and VM, to use an existing storage account, click Use existing and select the storage account and disk type for the VAs and VM.
|
|
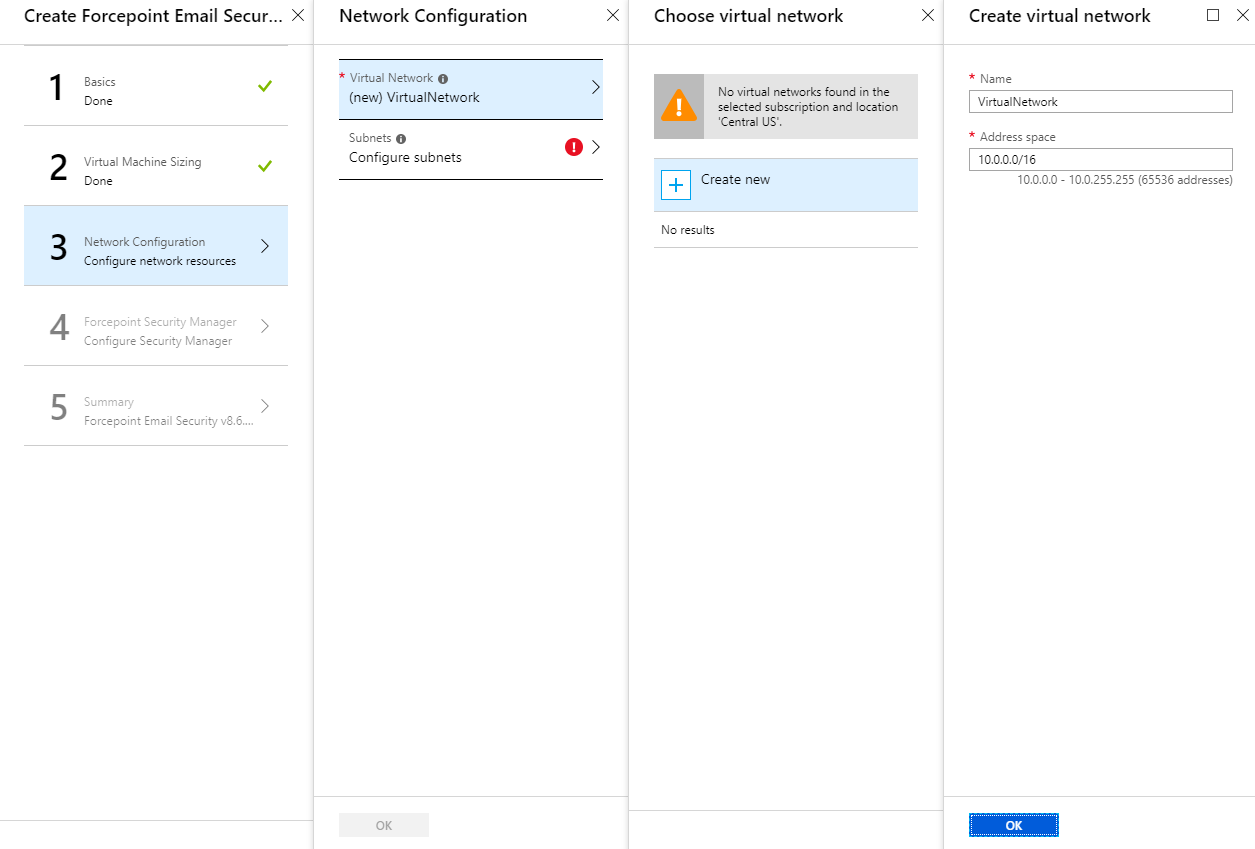
21.
|
From Virtual Network, select your existing virtual network or create a new network.
|
|
22.
|
From Subnets, select your existing subnet or create a new network.
|
|
24.
|
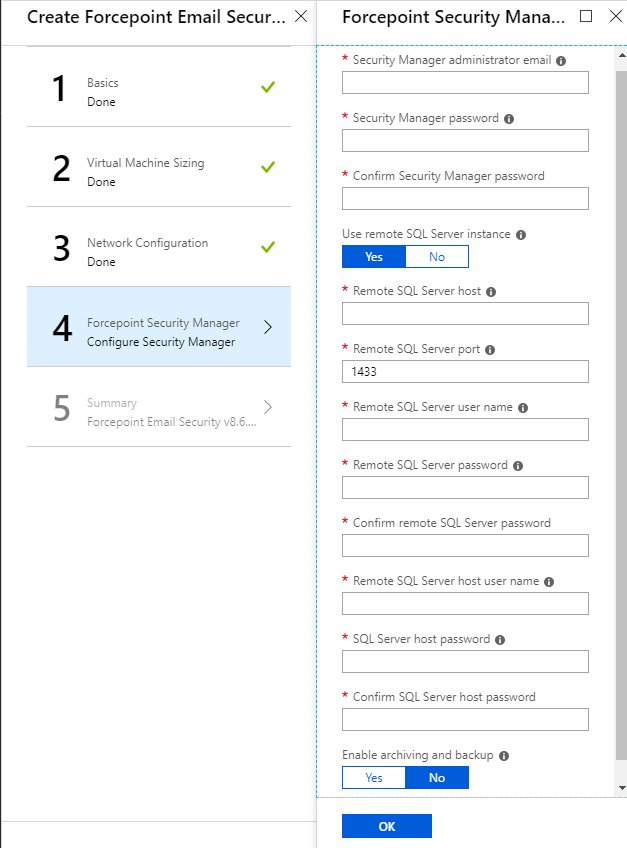
In the text field Security Manager administrator email, enter the email address of the Forcepoint Security Manager administrator.
|
|
25.
|
In the text fields Security Manager password and Confirm Security Manager password, enter and confirm the administrator password.
|
|
26.
|
|
27.
|
In the text fields, enter the host name, user name, password, and port for the remote or local SQL Server.
|
|
28.
|
|
29.
|
From Upload CA certificate for SQL Server encryption, click the folder icon and navigate to the certificate (.cer, .crt, or .pem).
|
|
30.
|
|
31.
|
In the text field SQL Server backup UNC path, enter the existing UNC path to the backup directory used by SQL Server.
|
|
32.
|
In the text field Security Manager backup UNC path, enter the existing UNC path to the backup directory used by Security Manager.
|
|
33.
|
In the text fields Archive location user name, Archive location password, and Archive location domain, enter the user name, password, and domain for the incident archive directory.
|
|
34.
|
Click OK.
|
|
35.
|
From the Summary tab, review a summary of the Forcepoint Email Security and Forcepoint Security Manager solution you are building, then click OK.
|
|
|
|
|
|
Installing Forcepoint Email Security in Microsoft Azure > Azure Deployment Steps: Versions 8.5.3 and 8.5.4 > Deploy both Forcepoint Email Security and Forcepoint Security Manager together in the Azure cloud
|