
|

|

|
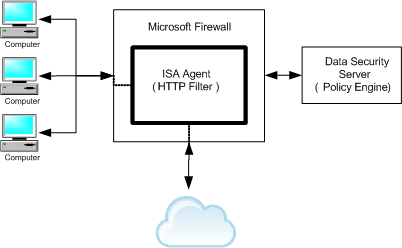
Installing Data Security Components > Microsoft ISA/TMG agent
|
|
1.
|
If your ISA or TMG Server machine has a 32-bit operating system, download the Websense installer (WebsenseTRITON77Setup.exe) from mywebsense.com.
|
|
4.
|
Select Custom.
|
|
5.
|
|
6.
|
|
7.
|
In the Destination Folder screen, specify the folder into which to install the agent.
|
|
8.
|
On the Select Components screen, select ISA or TMG agent and then Entire feature will be installed on local hard drive.
|
|
9.
|
In the Server Access screen, select the IP address to identify this machine to other Websense components.
|
|
10.
|
In the Register with the Data Security Server screen specify the path and log on credentials for the Data Security server to which this agent will connect. This could be the TRITON management server or a secondary Data Security server.
|
|
11.
|
In the Installation Confirmation screen, if all the information entered is correct, click the Install button to begin installation.
|
|
12.
|
Once installation is complete, the Installation Complete screen appears to inform you that your installation is complete. Click Finish.
|
|
13.
|
Once installation is complete, the Installation Successful screen appears to inform you that your installation is complete.
|
|
|
|
|
Installing Data Security Components > Microsoft ISA/TMG agent
|