
|

|

|

|
Getting started with SIEM Integration : Setting up SIEM integration
|
|
1.
|
|
2.
|
|
3.
|
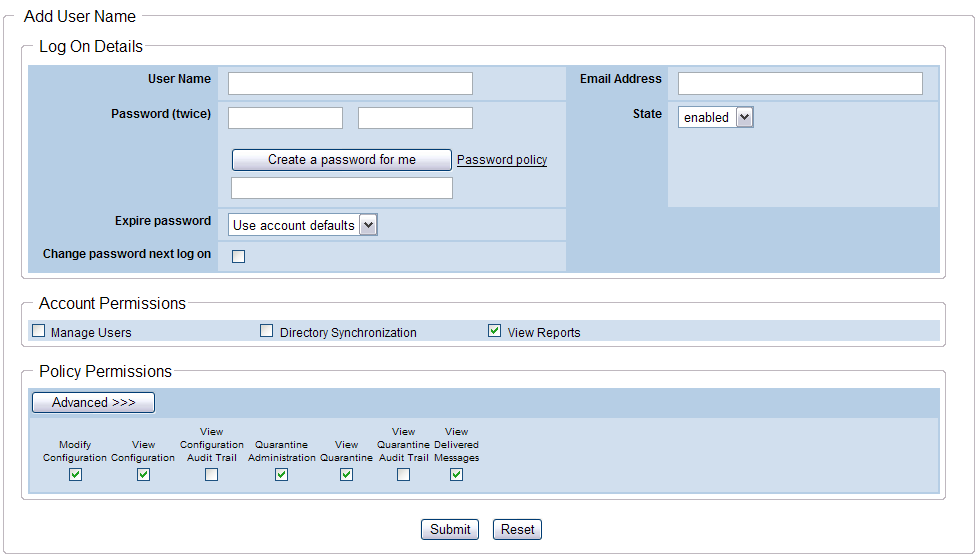
Enter identifying information for the new contact in the First name and Surname fields. For example, "SIEM" and "Logging."
|
|
4.
|
Click Submit.
|
|
5.
|
Click the link provided to supply a User name for the account.
|
|
6.
|
|
8.
|
Under Account Permissions, check the Log Export box, and any other permissions you want to give this user. You can act as an administrator from this logon.
|
|
If you give this contact only the Log Export permission and nothing else, the user name and password cannot be used to log on to the cloud portal. Although log on permissions are not needed to run the download script, the View Reports permission is the minimum permission a user needs to be able to log on.
|
|
9.
|
Click Submit.
|
|
The option to export data cannot be set to ON unless a valid storage option has been configured on Account > SIEM Storage.
|
|
1.
|
Open the Windows Services tool.
|
|
2.
|
Scroll down to Task Scheduler.
|
|
|
|
1.
|
Open the Windows Scheduled Tasks tool.
|
|
2.
|
Select Add/Create Scheduled Task.
|
|
|
|
|
To run as the user defined in Create a new administrator contact for Forcepoint storage, using the password defined for that user.
|
|
5.
|
Click OK.
|
|
|
|
|
|
Getting started with SIEM Integration : Setting up SIEM integration
|