Go to the table of contents Go to the previous page Go to the next page View or print as PDF
What's new in 2016 Release 3?
Cloud Web Protection Solutions | 27-Jul-2016
Data Security (DLP) support for blocking
Starting in this release, you can configure policies that block data security incidents.
1.
In the cloud portal, navigate to the Web > Policies page and select a policy.
2.
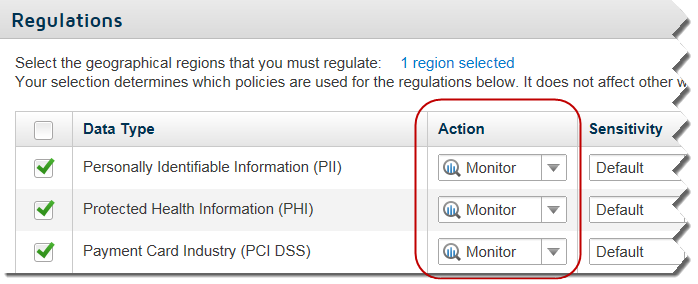
Select the Data Security tab for the policy.
3.
*
When you select the Monitor action (default), incidents are logged and appear in reports, but are not blocked.
*
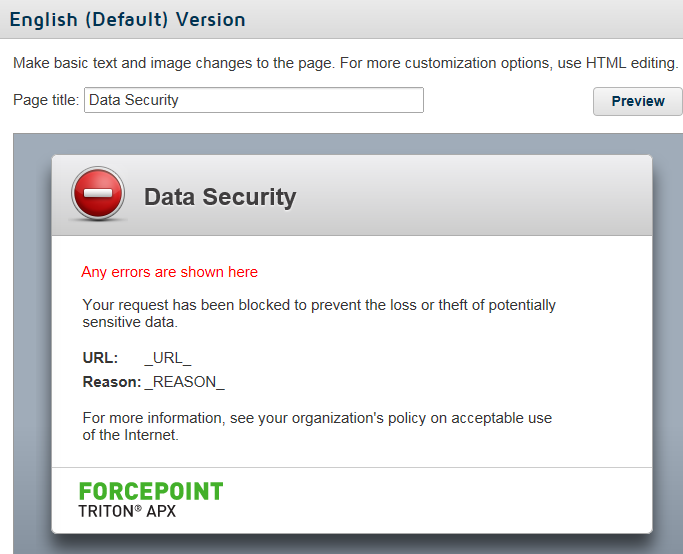
When you select the Block action, any incident that violates the selected regulation is blocked, and the user receives a new Data Security block page.
Optionally customize the Data Security block page on the Web > Block & Notification Pages page, under General.
In the Incident Manager, a new column, Action, is displayed by default. For DLP regulations and data theft that are monitored, rather than blocked, the action shown is Allow.
Action is also available as an attribute for report filtering.
New Direct Connect web endpoint client
TRITON AP-ENDPOINT Web now includes 2 endpoint client options:
*
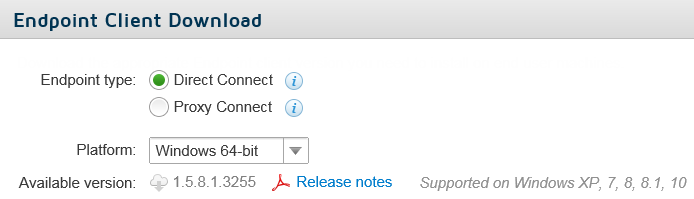
A new endpoint client known as Direct Connect will route traffic directly to the Internet and contact a new endpoint cloud service to determine whether to block or permit a request, perform analysis of traffic content, and/or deliver endpoint configuration.
The Direct Connect endpoint may be beneficial for roaming users where proxy-type connections are problematic. This includes, for example, websites that do not work well with a proxy, areas where geographic firewalls prohibit the use of proxies, situations where localized content is required regardless of user location, and in complex/changing network environments.
Please see the TRITON AP-ENDPOINT Web Direct Connect release notes (available soon) for further details.
*
The existing web endpoint client is now called the Proxy Connect endpoint. It redirects traffic to the cloud proxy for analysis.
Select which endpoint client to use on the Web > Settings > Endpoint page in the cloud portal. You can deploy a combination of Direct Connect and Proxy Connect endpoint clients in your organization.
Automatic initial deployment is not supported for Direct Connect web endpoints. Both the Direct Connect and Proxy Connect web endpoints, however, can optionally receive automatic updates.
Enhanced management for i-Series appliances and edge devices
A new, limited-availability interface makes it easier and more efficient to manage and configure i-Series appliances and edge devices. It includes the ability to:
*
*
*
When the feature is enabled for your account, you are prompted to try the new interface on the Web > Settings > Network Devices page. In case you aren't sure you're ready to make the change, a link at the bottom of the page can be used to toggle back to the original interface.
New and enhanced DLP classifiers
There are several new and improved DLP classifiers in TRITON AP-WEB Cloud. For details, refer to Data Security Content Classifiers.
New
*
Improved
*
*
*
*
*
*
*
*
*
*
*
Features now generally available
After a period of time as limited-availability features, the features described in this section are now available to all TRITON AP-WEB Cloud administrators.
Using an existing policy as a template for new policies
When creating a new policy on the Web > Policy Management > Policies page, you can use an existing policy as a template. To do this, select the Existing policy option next to Policy template, then select a policy from the drop-down list. The current settings in that policy are copied into your new policy, except for the following:
*
*
*
Policy upload
You can automatically assign end users to policies by uploading a CSV file to the cloud service. Every line of the file must contain 2 fields, separated by commas:
*
*
To upload the file, navigate to the Policy Assignment section of the Web > Policy Management > Policies page, then browse to the CSV file and click Upload.
Group and policy assignment for synchronized users
You can select how synchronized users are assigned to web policies if they appear in more than one group in the directory. On the Account > Groups page, click the Policy assignment method link, and select one of the following:
*
Directory hierarchy means that a user in multiple groups is assigned the policy for the group with the fewest intermediate group memberships. For example, if a user is a member of GroupA, and is also a member of GroupB which itself is a member of GroupC, the policy for GroupA takes precedence.
*
Group ordering means that a user in multiple groups is assigned the policy associated with the group highest in the list on the Groups page. If you change the order of the groups by dragging and dropping the group names in the list, the user's policy assignment also changes.
Google redirect controls
Use Google redirect options to control the Google domain that your end users see. By default, Google redirects browsers to the appropriate site for the country it detects (for example, google.fr for France). This may not be accurate, however, for end users browsing through a cloud service proxy that is in a different country.
To use this feature, first enable SSL decryption for the Search Engines and Portals category on the SSL Decryption tab, and install the root certificate on end user machines. Next, define Google redirect behavior on each policy's General tab.
Office 365 bypass
To ensure that Microsoft Office 365 applications function properly, the cloud service offers the option to bypass authentication or bypass the proxy entirely for Office 365. Enable the feature on the Web > Bypass Settings page. Select the Authentication Bypass or Proxy Bypass tab, then mark the Office 365 option.
Certificate error bypass
The cloud service verifies certificates for HTTPS sites that it has decrypted and analyzed. If certificate verification fails, by default, the end user sees an error page and cannot access the website. Optionally, use the SSL tab of the Web > Settings > Bypass Settings page to Allow end users to bypass all certificate errors.
When this feature is enabled, end users see a notification page informing them that there is a certificate error, and can either proceed to the site or go back. This notification page is not available with i-Series appliances.
Endpoint Auditing report
Use the Reporting > Account Reports > Endpoint Auditing page to see the current status of all users with web endpoint client software installed.
By default, the report displays the status of all endpoint users updated in the last 7 days, listing user names, workstation names, and whether the endpoint software is enabled or disabled. You can change the report to list only enabled or disabled endpoints, and edit the time period. You can also export the results to a CSV file.
End user controls for endpoint software
Optionally, give some or all users the ability to enable or disable web endpoint client software on their machines. This may be useful, for example, for users working in a location that blocks web traffic to the cloud service. Note, however, that this option can introduce vulnerabilities: if enabled, it permits end users to circumvent the protections offered by the endpoint software.
To enable end user controls, select the End User Control tab of the Web > Settings > Endpoint page. You can then specify whether to allow all users or specified users, groups, policies, or connections to enable and disable the endpoint client software.
Secure form-based authentication
For users who are using neither single sign-on nor the web endpoint to connect to the cloud service, you can enable Secure form-based authentication to display a logon form to the end user. When users enter their cloud credentials, their request is sent over a secure connection for authentication.
Enable secure form-based authentication on the Access Control tab of your web policies.
Extended session timeout period
Users' credentials for single sign-on and secure form-based authentication must be revalidated periodically for security reasons. The time period is defined on the Access Control tab of your web policies under Session timeout. There are now options to extend the period beyond 30 days, to 3 months, 6 months, or 12 months.

Go to the table of contents Go to the previous page Go to the next page View or print as PDF
Copyright 2016 Forcepoint LLC. All rights reserved.