
|

|

|

|
Configuring proxy chaining with the Forcepoint cloud service : Microsoft ISA Server or Forefront TMG
|
|
|
Basic chaining. The ISA server does not perform any authentication before forwarding requests to the cloud proxy. The cloud proxy can perform manual authentication only.
|
|
|
NTLM pass-through. The ISA server is aware of a requirement for NTLM identification but takes no part in the authentication, forwarding requests to the cloud proxy which then performs NTLM identification.
|
|
|
X-Authenticated-User. The ISA server performs user authentication and forwards requests to the cloud proxy using the X-Authenticated-User header.
|
|
1.
|
Log on to the ISA/TMG server and open the Server Management console.
|
|
2.
|
Under Configuration, open the Networks option and select the Web Chaining tab. Under this tab a default rule is present. Leave this as it is.
|
|
3.
|
|
6.
|
Click Add and select the appropriate network.
|
|
7.
|
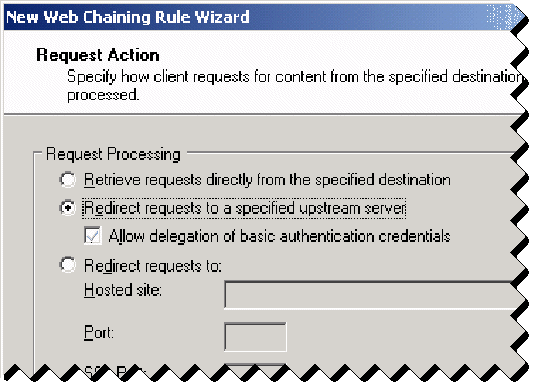
Click Next to specify how requests are to be handled. This is where you specify that requests be sent to an upstream server (i.e., Forcepoint Web Security Cloud).
|
|
8.
|
|
9.
|
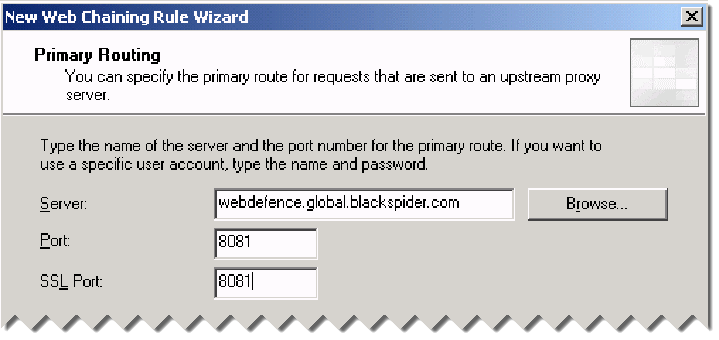
On the Primary Routing page, specify the address of the Forcepoint Web Security Cloud service: webdefence.global.blackspider.com
|
|
11.
|
On the Backup Action page, select the appropriate action for your organization. Your choice depends on whether you are willing to allow requests to be served directly, without using Forcepoint Web Security Cloud. Click Next.
|
|
12.
|
Review your settings and click Finish.
|
|
1.
|
|
2.
|
|
4.
|
|
5.
|
|
6.
|
|
7.
|
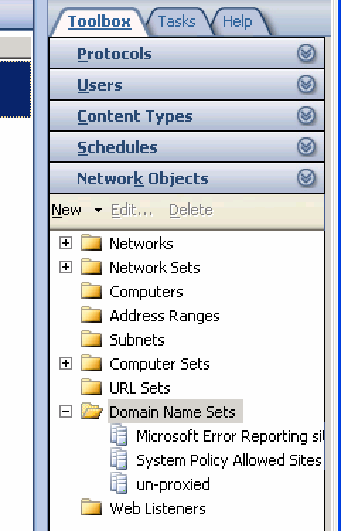
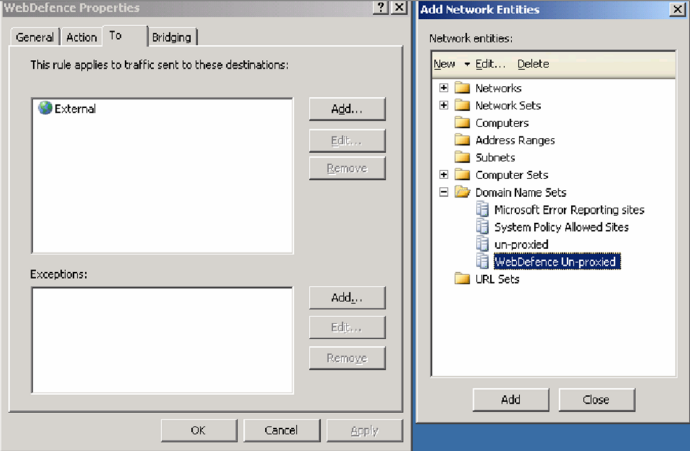
Expand Domain Name Sets, select the domain set you just created (Forcepoint Web Security Cloud Unproxied), and click Add.
|
|
8.
|
|
9.
|
|
3.
|
|
4.
|
Select Authenticate users on first access, then select NTLM transparent identification where possible. For more information, see NTLM identification in the Web Security Cloud Help.
|
|
5.
|
Click Save.
|
|
2.
|
Select the Downloads tab.
|
|
3.
|
Select Forcepoint Web Security Cloud from the Product drop-down list.
|
|
4.
|
In the list that appears, expand TMG 64-bit plugin for Content Gateway or ISA 32-bit plugin for Content Gateway to see the download details. You will need to scroll down to older product versions to see the ISA 32-bit plug-in. Click the download link to start the download.
|
|
1.
|
Copy the appropriate Websense-AuthForward.dll file (for 32-bit or 64-bit) to the Microsoft ISA/TMG installation directory. The default directory for this file is C:\Program Files\Microsoft ISA Server for ISA server, or C:\Program Files\Microsoft Forefront Threat Management Gateway for ForefrontTMG.
|
|
4.
|
Verify the plug-in was registered in the ISA/TMG management user interface (Start > Programs > Microsoft ISA Server > ISA Server Management, or Start > Programs > Microsoft Forefront TMG > Microsoft Forefront TMG Management). In the Configuration (for 32-bit) or System (for 64-bit) section, select Add-ins, then click the Web-filter tab. The WsAuthForward plug-in should be listed.
|
|
|
|
|
|
Configuring proxy chaining with the Forcepoint cloud service : Microsoft ISA Server or Forefront TMG
|