Installation and Configuration Guide
Websense Authentication Service
Installation and Configuration Guide

|

|

|

|
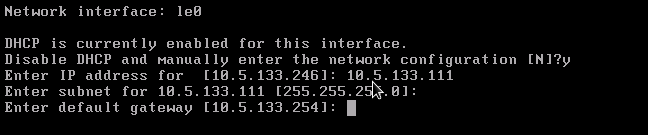
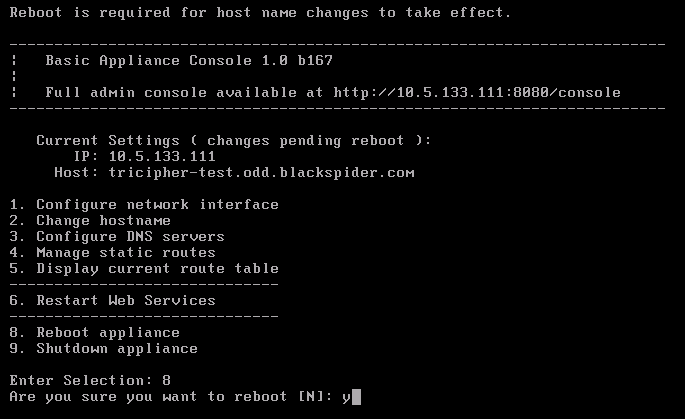
Installing Authentication Service > Installation procedure > Configure network interface
|
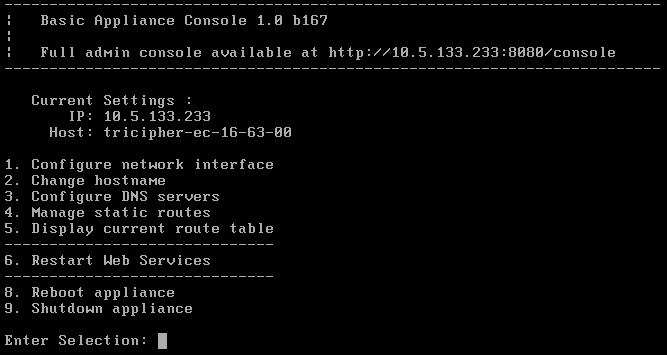
During startup, the VM outputs boot messages to the VGA console. You do not usually need to watch these. When boot up is complete, the Appliance Console Menu appears.Authentication Service has acquired an IP address for its single network interface (if a DHCP server is present) and generated a temporary host name. You will probably want to change both.
|
|
|
|
|
Installing Authentication Service > Installation procedure > Configure network interface
|