
|

|

|
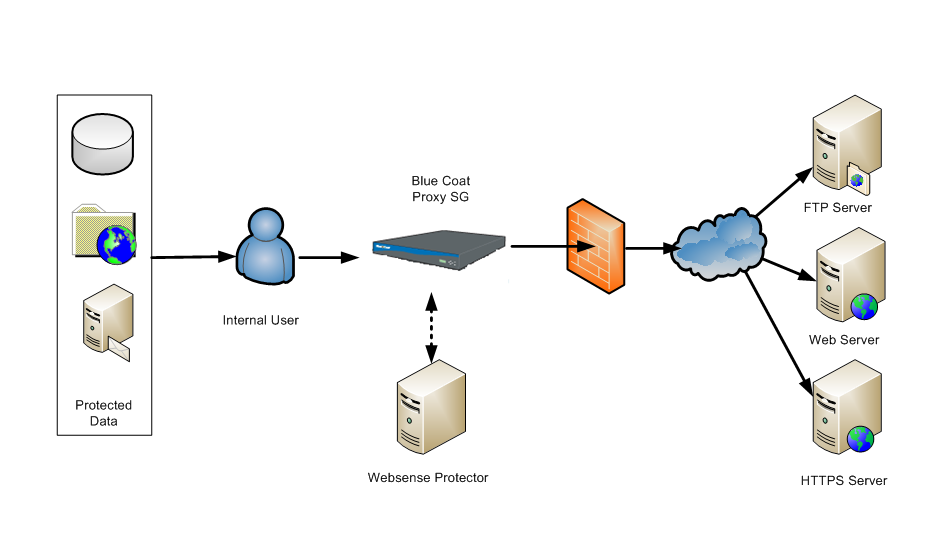
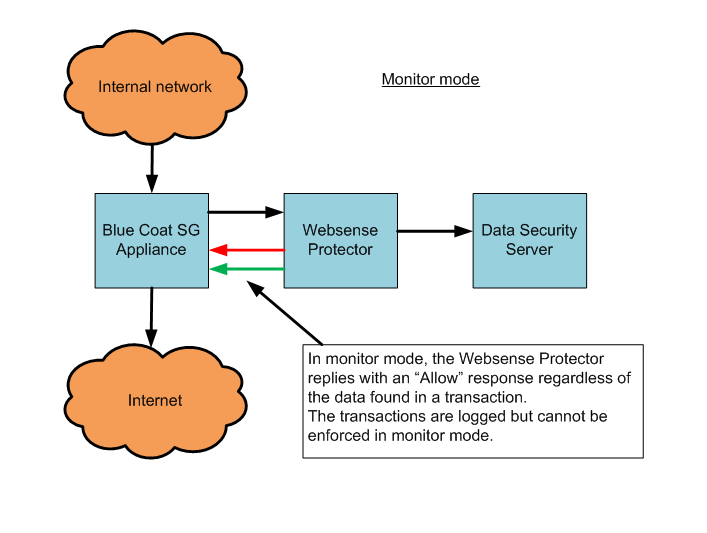
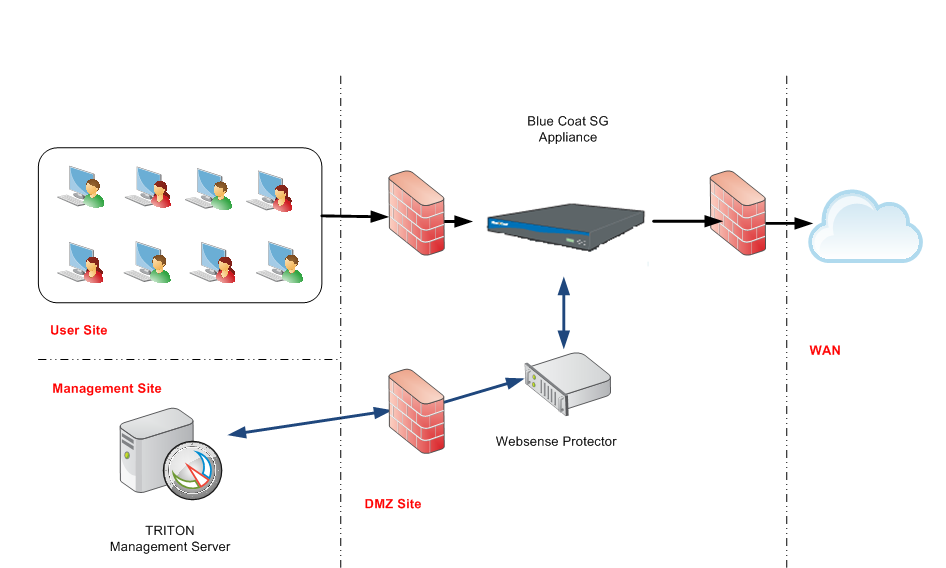
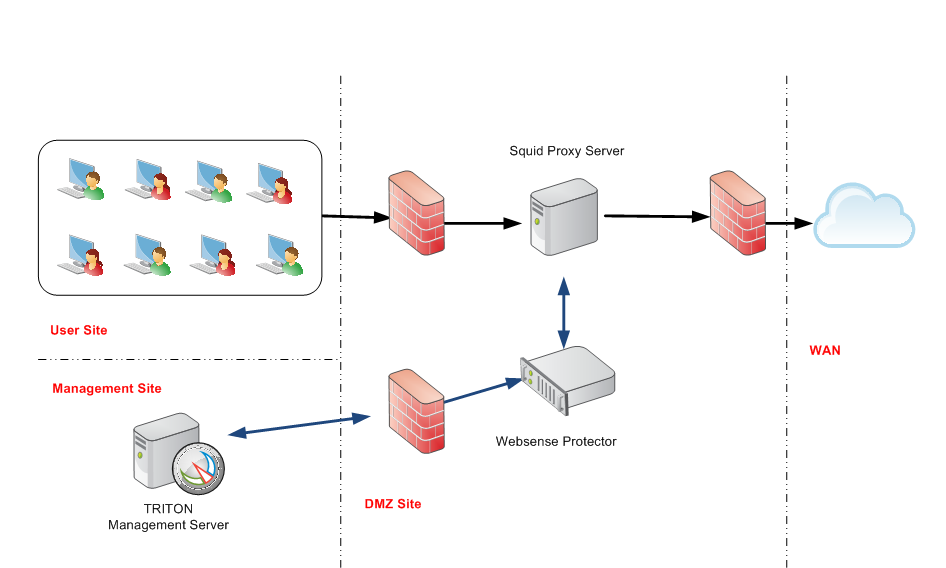
Integrating Data Security with Existing Infrastructure > Working with Web proxies
|

|
1.
|
Open TRITON - Data Security, and go to Settings > System Modules.
|
|
1.
|
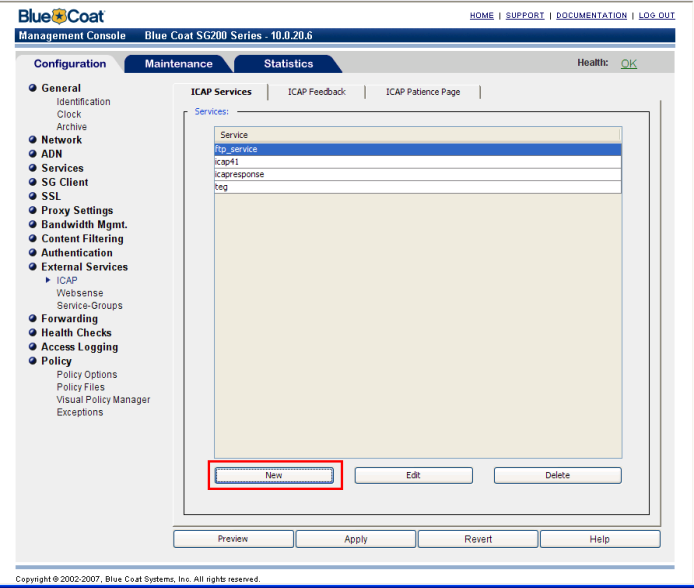
Select Configuration > External Services > ICAP.
|
|
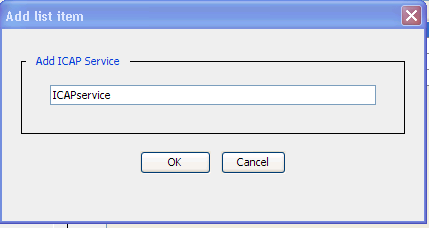
a.
|
Click New.
|
|
b.
|
In the Add ICAP Service field, enter an alphanumeric name.
|
|
c.
|
Click OK.
|
|
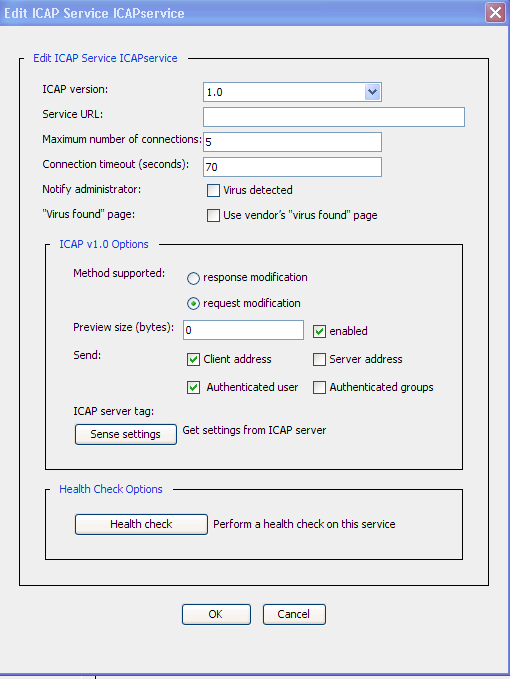
3.
|
In the Services list, select the new ICAP service name and click Edit. The following screen appears:
|
|
Check the Virus detected box to send an email to the administrator if the virus scan detects a match. The notification is also sent to the Event Log and the Event Log email list.
|
|
|
5.
|
Click OK.
|
|
6.
|
Click Apply.
|
|
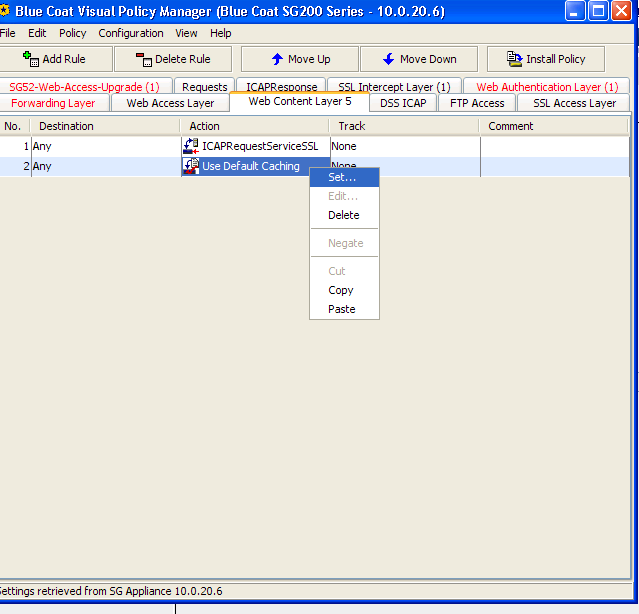
1.
|
Select Configuration > Policy >Visual Policy Manager.
|
|
2.
|
Click Launch.
|

|
3.
|
In the Visual Policy Manager, select Add a policy.
|
|
6.
|
|
7.
|
|
8.
|
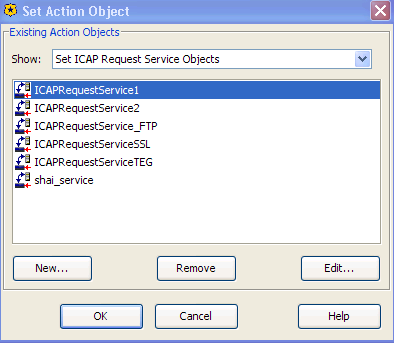
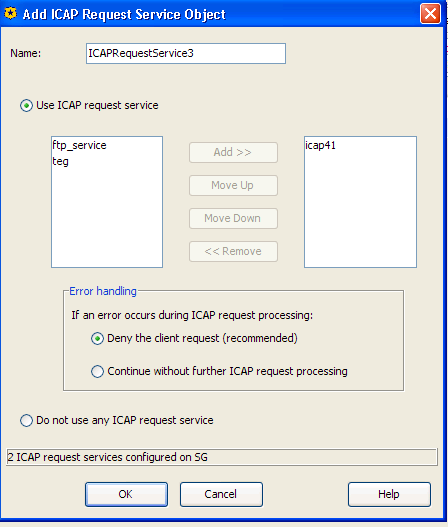
Click New > Set ICAP Request Service.
|
|
10.
|
|
11.
|
Click OK twice.
|
|
12.
|
Click Install policy.
|
|
1.
|
Open TRITON - Data Security, and go to Settings > System Modules.
|
|
|
|
|
Integrating Data Security with Existing Infrastructure > Working with Web proxies
|