
|

|

|

|
|
1.
|
Select Main > Policy Management > Resources.
|
|
2.
|
From the Remediation section, select the Notifications option.
|
|
3.
|
Click New on the toolbar.
|
|
5.
|
On the General tab, complete the fields as follows:
|
|
Enter the name of the person from whom notifications should be sent. This is the name that will appear in the email From field. Maximum length: 1024 characters.
|
|
|
6.
|
The outgoing mail server that's been configured appears on screen. If you want to change the server used, click Edit (the pencil icon).
Note that if you change the mail server properties, it changes all occurrences of this server (such as alerts). |
|
Type the subject of the notification. This appears in the email Subject: line. Click the right arrow to choose variables to include in the subject, such as "This is to notify you that your message was %Action% because it breached corporate policy." Maximum length: 4000 characters.
|
|
|
Click Edit to select to select business units or directory entries.
Select Additional email addresses then click the right arrow to select a dynamic recipient that varies according to the incident. For example, you can choose to send the notification to the policy owners, administrators, source, or source's manager. Select the variable that applies, such as %Policy Owners%. Separate multiple addresses with commas.
|
|
8.
|
On the Notification Body tab, select a notification type and display format from the drop-down lists.
|
|
|||||
|
To support this feature, you must create an email account for the TRITON AP-DATA system in Exchange. To avoid reconfiguration, make sure the credentials assigned to this mailbox do not expire. Once done, navigate to Settings > General > Mail Servers and configure the incoming mail server. Use this mailbox for the system email address.
|
|||||
|
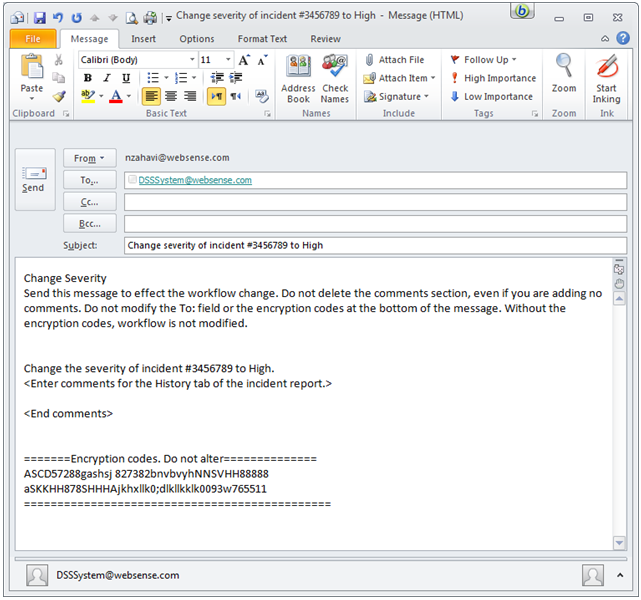
See the knowledgebase article, "Releasing blocked email in TRITON AP-DATA" for instructions on setting up the release by reply capability. You must configure options in both TRITON AP-DATA and Microsoft Exchange to enable it.
|
|||||
|
To include links in notifications or to allow recipients to release messages, you must configure the incoming mail server to use to receive these requests. To do so, click Mail Server Settings on the toolbar. See Mail servers for more information.
|
|
9.
|
Click OK to save your changes.
|
|
|
|
|
|