
|

|

|

|
Presentation Reporting Quick Start : Schedule presentation reports to run
|
|
1.
|
On the Presentation Reports page, click Scheduler.
|
|
2.
|
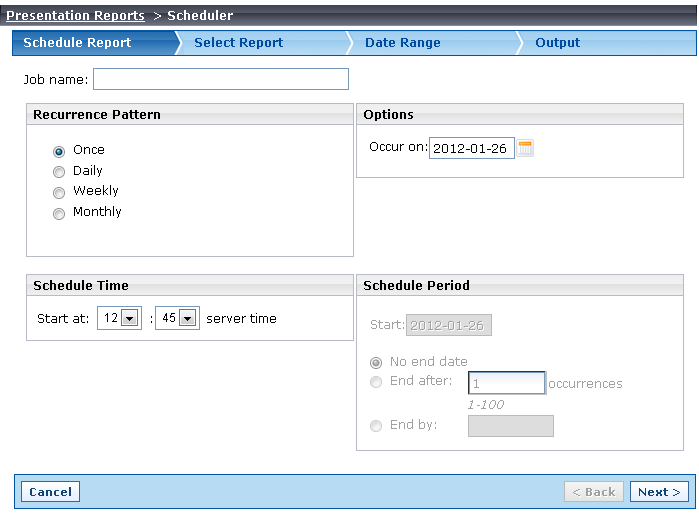
Enter a Job name for this scheduled report job.
|
|
3.
|
Select a Recurrence Pattern, which determines how frequently the job runs (Once, Daily, Weekly, or Monthly).
|
|
|
|
|
If you select Daily no additional recurrence options are provided.
|
|
|
If you select Weekly, under Options, mark the check box next to each day of the week you want to run the job.
|
|
|
If you select Monthly, the Options section allows the entry of multiple dates.
|
|
4.
|
Under Schedule Time, use the 24-hour Start at clock to specify what time the report should run. First select the hour (00 through 24) from the first list, then select the minutes (available in 5 minute increments). The current time is entered by default.
|
|
|
If the report will recur, enter a Start date to indicate when the report should first run. The current date is displayed, but you can enter a future date.
|
|
The Start date and Start at time entries, in combination, must be later than the current date and time or an error message is displayed.
|
|
|
No end date (default) causes the job to recur until you manually disable or delete it.
|
|
|
End after lets you enter the number of times the job should run. Once the job has executed that many times, it does not reschedule itself.
|
|
|
End by lets you enter the date for the last recurrence. After that date, it does not reschedule itself.
|
|
6.
|
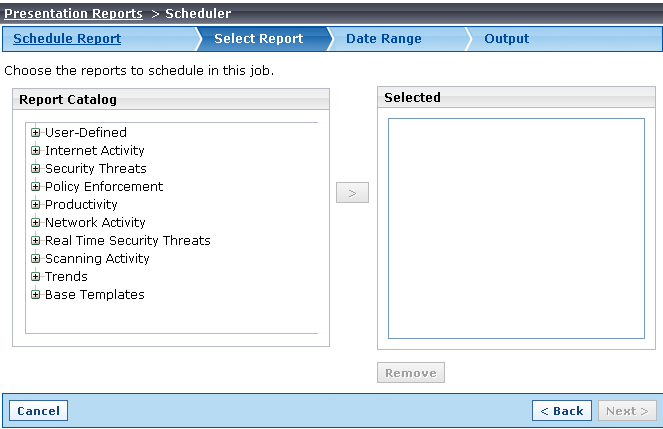
Click Next to move to the Select Report tab.
|
|
8.
|
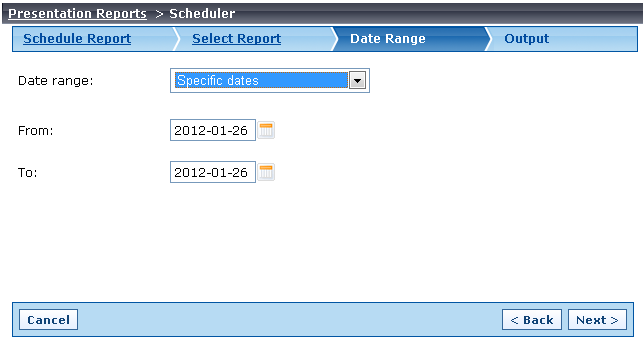
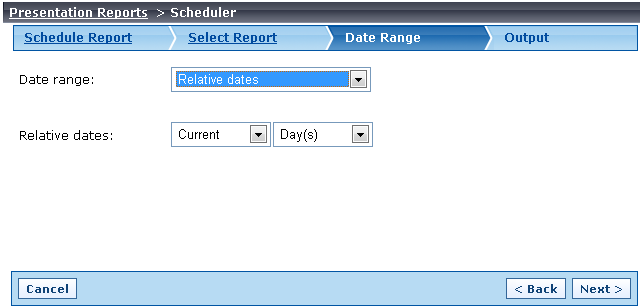
Click Next to continue to the Date Range page. The dates selected here determine which dates' data are included in the report.
|

|
|
All dates (default) means that all dates with available data are included in the report. Depending on how much data your organization maintains in active database partitions, this can result in very large reports.
|
|
|
Specific dates allows you to enter a date range. This option is intended for reports that are run only once, because the same range is used each time the job runs (in other words, all reports will contain the same data).
|
|
|
Relative dates lets you establish the date range included in the reports relative to the date on which the job runs, so that a different data set is used for each iteration of the report.
|
|
9.
|
Click Next to open the Output tab, used to finish defining your job.
|
|
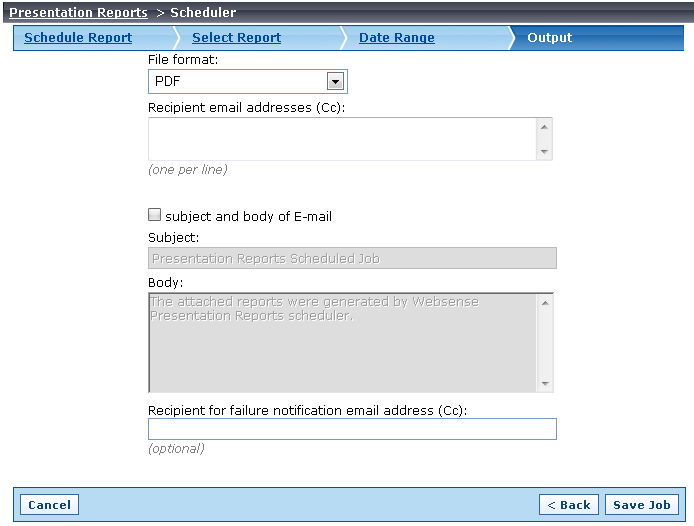
10.
|
Use the File format drop-list to select the output format for the reports: PDF (Adobe Reader 7.0 or later), XLS (Microsoft Excel 2003 or later), or HTML.
|
|
11.
|
Enter one or more Recipient email addresses to specify who will receive the reports.
|
|
12.
|
Mark the subject and body of e-mail check box to edit the Subject and Body fields of the email message sent with the finished report.
|
|
13.
|
Enter a Recipient for failure notification email address. A message is sent to this address if report generation fails.
|
|
14.
|
Click Save Job. The Job Queue opens, with your new job listed. See Track scheduled presentation reports in the Job Queue.
|
|
|
|
|
|
Presentation Reporting Quick Start : Schedule presentation reports to run
|