
|

|
Working with TRITON RiskVision Rules
|
|
|
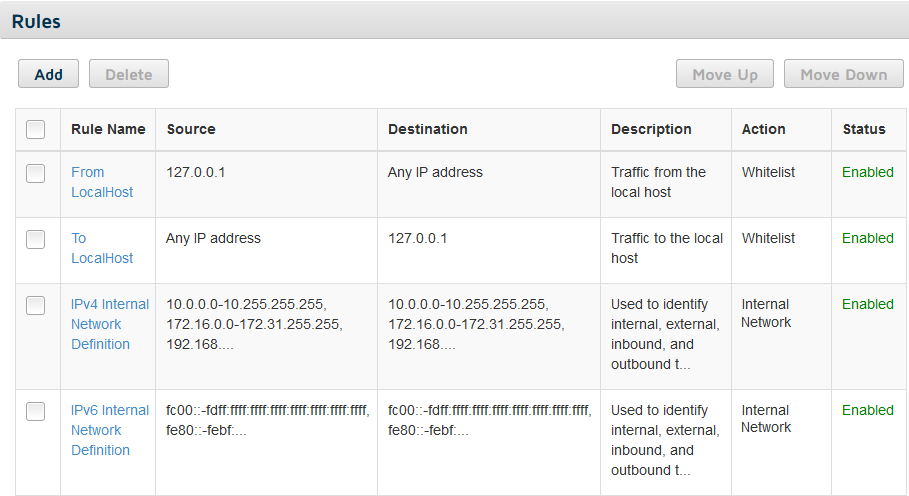
Whitelist rules instruct RiskVision services to ignore traffic sent to or from specific IP addresses, IP address ranges, or subnets.
|
|
|
Internal network rules are used by RiskVision analytics, which need to distinguish inbound traffic from outbound traffic. For example, data analysis is performed only on outbound traffic.
|
|
|
From LocalHost whitelists all traffic originating from the RiskVision appliance (like requests to the File Sandbox and checks for system updates).
|
|
|
To LocalHost whitelists all traffic sent to the RiskVision appliance (like File Sandbox responses and analytic database downloads).
|
|
|
IPv4 Internal Network Definition is used to identify all IPv4 traffic between, originating from, or received by devices in your network.
|
|
|
IPv6 Internal Network Definition s used to identify all IPv4 traffic between, originating from, or received by devices in your network.
|
|
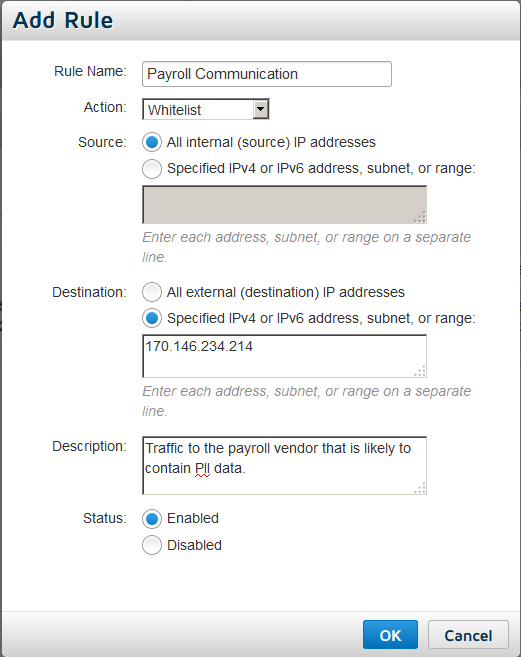
1.
|
Enter a unique Rule Name in the field at the top of the Add Rule dialog box.
|
|
3.
|
Specify a Source IP address, subnet, or range.
|
|
4.
|
Specify a Destination IP address, subnet, or range.
|
|
5.
|
Enter a rule Description for ease of maintenance.
|
|
6.
|
Specify whether the rule will be Enabled (active) or Disabled (saved, but not used) when you click OK.
|
|
7.
|
Click OK to save your rule and return to the Rules page.
|
|
|
When you click OK in the Edit Rules dialog box, your changes are saved, you are returned to the Rules page, and a confirmation message is displayed at the top of the page to indicate that the change was successful.
|
|
|
|
Working with TRITON RiskVision Rules
|