
|

|

|

|
Advanced Email Encryption End-User Guide > Responding to secure email
|
|
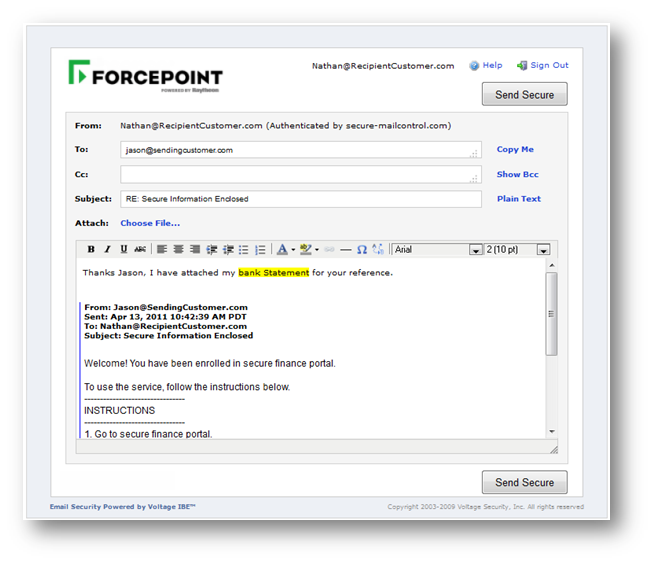
1.
|
|
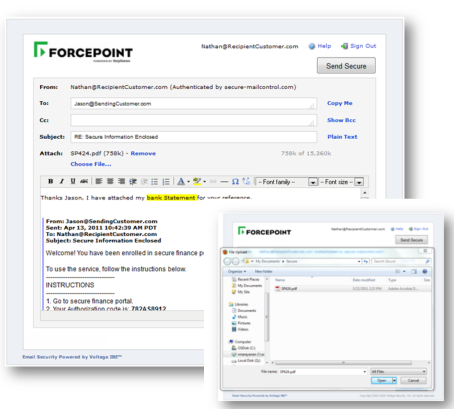
2.
|
|
4.
|
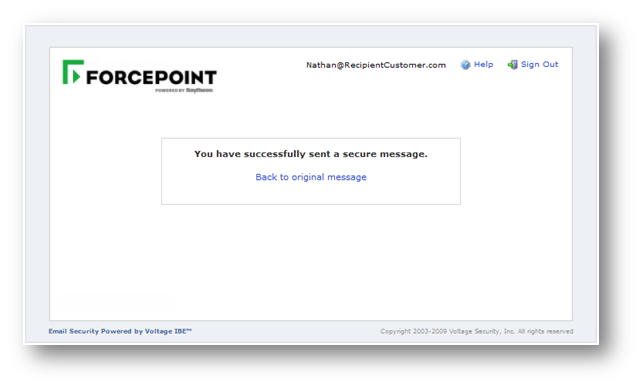
Click Send Secure to send your reply.
|
|
|
|
|
|
Advanced Email Encryption End-User Guide > Responding to secure email
|