
|

|

|

|
Forcepoint Email Security Cloud: End User Quick Start Guide
|
|
|
|
|
|
|
|
|
|
|
|
|
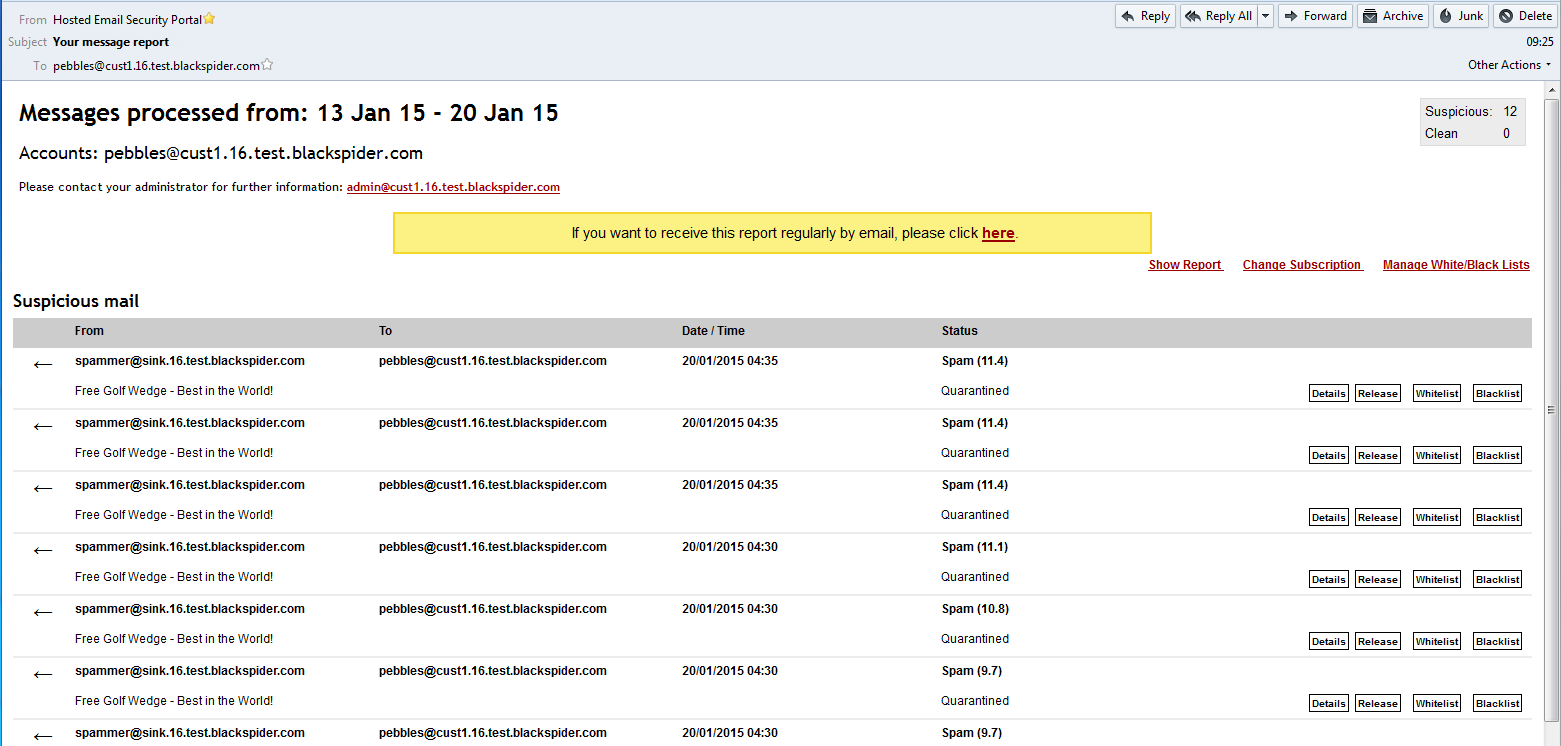
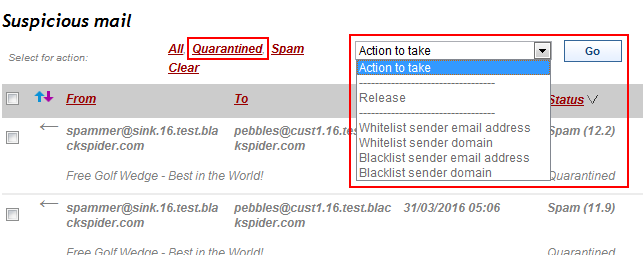
1.
|
Select the messages. You can choose them individually or you can click Quarantined, Spam, or All to select these messages all at once.
|
|
2.
|
Choose an action from the drop-down list, Action to take.
|
|
3.
|
Click Go.
|
|
|
|
|
|
Forcepoint Email Security Cloud: End User Quick Start Guide
|