
|

|

|
Integrating Web Security with Citrix > Configure the Citrix Integration Service installation package
|
|
1.
|
Double-click the configuration package executable, then click Extract. The package name is WCISUtil_x64_nnnn.exe.
|
|
2.
|
Double-click Websense Citrix Integration Service Configuration.exe to start the configuration utility.
|
|
3.
|
In the Profile Source screen, click Browse and select the folder containing either the default Citrix installation package template or an existing installation package that you want to modify, then click Next.
|
|
4.
|
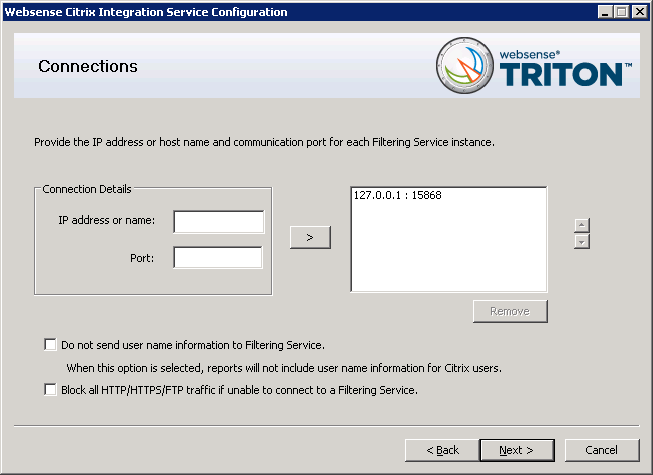
In the Connections screen, configure Filtering Service connection behavior for Citrix Integration Service as described below. When you are finished, click Next.
|
|
a.
|
|
b.
|
Under Connection Details, enter the IP address or hostname of a Filtering Service machine, then enter the filtering port (15868 by default).
|
|
The Filtering Service port must be in the range 1024-65535. To determine what port is used by Filtering Service, check the eimserver.ini file—located in C:\Program Files or Program Files (x86)\Websense\Web Security\bin (Windows) or /opt/Websense/bin/ (Linux)—on the Filtering Service machine. In this file, look for the WebsenseServerPort value.
Important: Do not modify the eimserver.ini file.
|
|
c.
|
|
d.
|
|
e.
|
Enable or disable the Do not send user name information to Filtering Service option. If this option is selected (enabled), user name information for Citrix users is not included in reports.
|
|
f.
|
Enable or disable the Block all HTTP/HTTPS/FTP traffic if unable to connect to a Filtering Server option to determine whether Citrix Integration Service blocks or permits all requests when it cannot communicate with Filtering Service.
|
|
5.
|
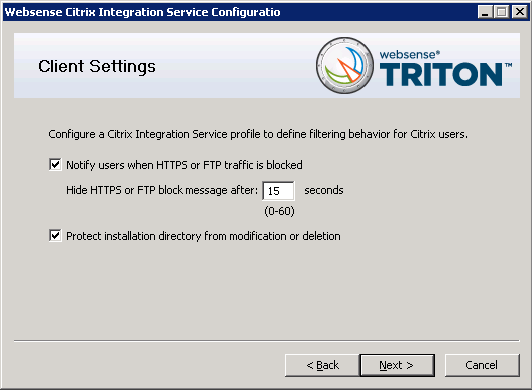
In the Client Settings screen, select options as described below. When you are finished, click Next.
|
|
|
Notify users when HTTPS or FTP traffic is blocked: Determine whether users see a browser pop-up message when HTTPS or FTP traffic is blocked. If so, also specify the how long the pop-up message remains visible.
|
|
|
Protect installation directory from modification or deletion: This option prevents tampering with the Citrix Integration Service on the Citrix server. Attempts to delete it, replace files, or modify registry entries are stopped.
|
|
6.
|
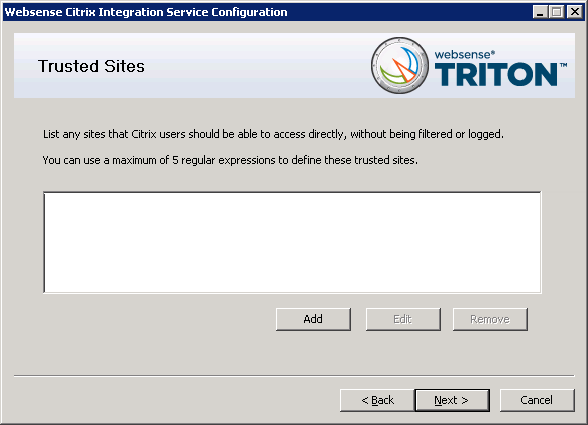
On the Trusted Sites screen, specify any URLs or domains that should be ignored (not forwarded for policy enforcement). When you are finished, click Next.
|
|
|
To add a URL or regular expression, click Add, then enter either a URL or a regular expression specifying a set of URLs. Any regular expression adhering to ISO/IEC TR 19768 (within the character-number limit) is valid. When you are finished, click OK.
|
|
7.
|
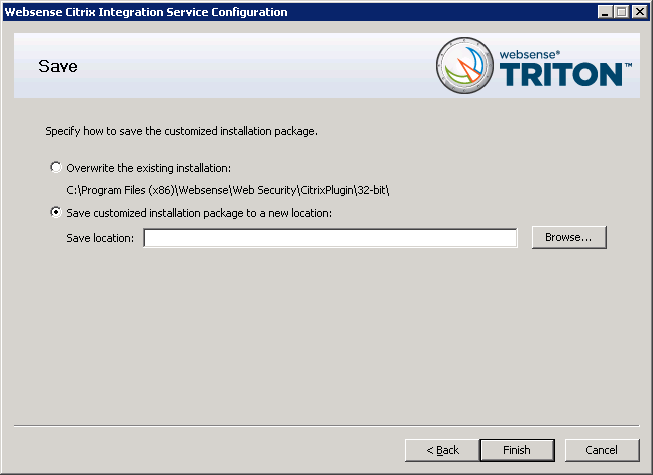
On the Save screen, specify how you want the customized installation package saved. When you are finished, click Finish.
|
|
|
|
|
Select Save the customized installation package to a new location to save the customized installation package to a different location. Click Browse, and specify a folder. It is a best practice to save to an empty folder. Then, you can be certain that all files in that folder are part of the installation package.
|
|
|
|
|
Integrating Web Security with Citrix > Configure the Citrix Integration Service installation package
|