Deployment and Installation Center
Websense TRITON Enterprise v7.6.x


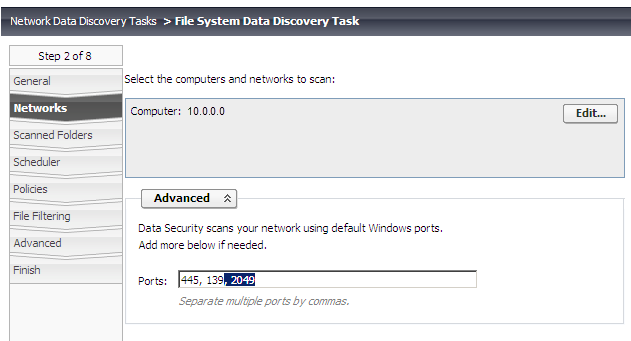
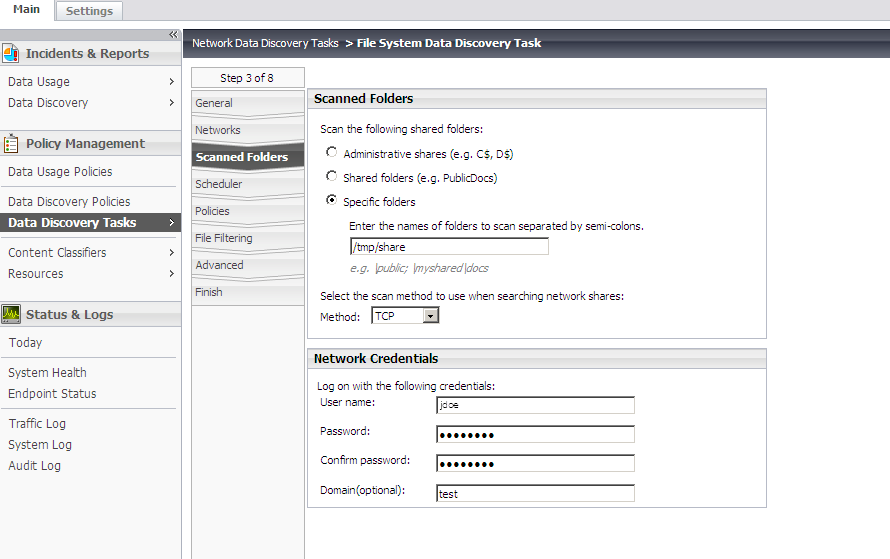
Discovery is the act of determining where sensitive content is located in your enterprise. If you have shared drives, for example on Windows or Novell, you can create a data discovery task that describes where and when to perform discovery on these drives, including specific network locations to scan.
*
NDS - Novell Directory Services - Using NDS, a network administrator can set up and control a database of users and manage them using a directory with an easy-to-use graphical user interface (GUI). Users at remote locations can be added, updated, and managed centrally. Applications can be distributed electronically and maintained centrally. The concept is similar to Microsoft's Active Directory.
*
Novell Client for Windows - a client software used so that Windows machines can authenticate through NDS and access shared resources on Novell servers.
1.
Create a user account in Novell eDirectory (NDS). This user will be used by the Websense Data Security Discovery agent to authenticate with Novell eDirectory and access files and folders.
2.
Run setupnw.exe and select Custom Installation.
3.
Make sure Novell Distributed Print Services is not checked and click Next.
4.
Make sure NetIdentity Agent and NMAS are checked and click Next.
9.
11.
Click Cancel.
12.
14.
On all connections, click Detach until no connections remain.
a.
Select Main > Policy Management > Discovery Policies.
b.
Select Network Discovery Tasks.
c.
Click New, and select File System Task from the drop-down list.
d.
On the Networks page, click Edit to select the Novell server's IP address.
e.
Click Advanced, and add the Novell access port number 524.
f.
On the Scanned Folders page, use the Data Security service account for authentication.
If you want to perform data discovery on Windows file shares, you need to install NFS client on your Data Security server. If you have more than one Data Security server, install NFS client on the one with the crawler you will use to perform discovery.
1.
On the Data Security server you will use to perform discovery, install the NFS client from the "Windows Services for Unix" package. You can download the package from Microsoft's Technet.
3.
After installation has completed, select Start > Programs > Windows Services for UNIX > Services for UNIX Administration.
4.
Navigate to Client for NFS and set the file permissions to All, Read, Write and Execute.
7.
Click Apply when done.
8.
Navigate to User Name Mapping.
9.
On the Configuration tab specify whether the user name to be mapped will be imported from a Network Information Service (NIS) or from password/group files (/etc/passwd and /etc/group). For NIS mapping, enter the IP address or host name of the NIS server and the NIS domain name. Files are used in the example below.
Note 
If you select User Password and Group Files, you only need to add the users and groups that need to be mapped.
10.
On the Maps tab, select the machine or domain for the user account that will be specified in the discovery task and click List Windows Users.
11.
Click List UNIX Users and specify an account that has access to the NFS share.
15.
Create a file system task. Select Main > Policy Management > Discovery Policies, and then select Add Network Task > File System Task.
16.
On the General screen, add a name and description for the discovery task and select the crawler to perform the discovery (the one where you installed the NFS client).
17.
On the Networks screen, click Advanced and add port 2049 to the existing list of scanned ports.
18.
On the Scanned Folders screen, specify the shared to be scanned and the user name and password of the Windows user mapped to the UNIX user name.
Note 
Network discovery has a limit of 255 characters for the path and file name. Files contained in paths that have more than 255 characters are not scanned.
*
Administrative shares - Select this if you want to scan administrative share drives such as C$.
*
Shared folders - Select this if you want to scan shared folders such as PublicDocs.
*
Specific folders - Select this if you want to scan specific folders, then enter the name(s) of the folder(s) to scan, separated by semi-colons.
*
TCP - Select TCP if you want to scan the share drives using transmission control protocol.
*
ICMP - Select ICMP if you want to scan the share drives using Internet control message protocol.