Deployment and Installation Center
Websense TRITON Enterprise v7.6.x

Go to the table of contents Go to the previous page Go to the next page Go to the index
Custom Deployment > Installing Email Security Components

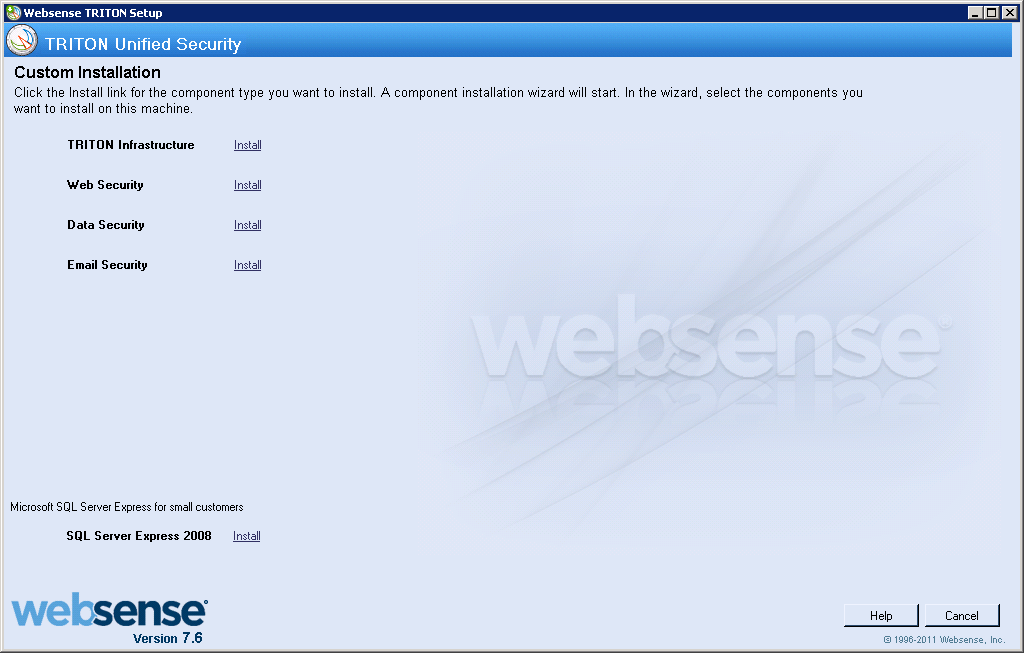
Websense Email Security Gateway is an exclusively appliance-based solution. All components run on the appliance exclusively except for TRITON - Email Security (i.e. the Email Security module of the TRITION Unified Security Center) and Email Security Log Server. These are the only two Email Security components that may be installed using the Websense installer.
2.
On the Custom Installation dashboard, click the Install link for Email Security.
4.
On the Introduction screen, click Next.
5.
If TRITON Infrastructure is not detected, then the Email Security Installer operates in custom mode, see the remaining steps below.
6.
In the Select Components screen specify whether you want to install Email Security Log Server.
Email Security Log Server is selected for installation by default. To install Email Security Log Server, SQL Server or SQL Server Express (see System Requirements for supported database systems) must already be installed and running in your network.
If you choose to install Email Security Log Server, the Email Security Log Server Configuration utility is also installed. This utility can be accessed by selecting Start > All Programs > Websense > Email Security > Email Security Log Server Configuration.
7.
If TRITON Infrastructure is not found already installed on this machine, the Log Database screen appears. Specify the location of a database engine and how you want to connect to it.
*
Log Database IP: Enter the IP address of the database engine machine. If you want to use a named database instance, enter it the form <IP address>\<instance name>. Note that the instance must already exist. See your SQL Server documentation for instructions on creating instances.
If you chose to install SQL Server Express as part of the installation of the TRITON Unified Security Center, the log database IP address should be that of the TRITON Unified Security Center machine.
*
Database login type: Select how Email Security Log Server should connect to the database engine.
*
Trusted connection:connect using a Windows trusted connection.
*
Database account:connect using a SQL Server account.
*
If using a trusted connection, enter the domain\username of the account to be used. This account must be a trusted local administrator on the database engine machine.
When you click Next, connection to the database engine is verified. If the connection test is successful, the next installer screen appears.
8.
On the Email Security Database File Location screen, specify where Email Security database files should be located and then click Next.
This screen appears only if you chose to install Email Security Log Server. A default location for the Log Database is automatically shown. It is a best practice to use the default location. If you want to create the Log Database in a different location (or if you already have a Log Database in a different location), enter the path to the database files. The path entered here is understood to refer to the machine on which the database engine is located. The path entered must specify a directory that already exists.
If any Email Security components (e.g., TRITON - Email Security or another instance of Email Security Log Server) have already been installed in your deployment, the following message appears:

The Email Security database exists, do you want to remove it?
This occurs because the database was created upon installation of the other Email Security components. Click No to continue using the existing database. In general, you should keep the database if you are sure the database was created only during the course of installing other components in your current deployment.
Clicking Yes removes the database..
Warning 
If any Email Security log data has been written to the database it will be lost if you remove the database. If you want to keep this data, back up the esglogdb76 and esglogdb76_n databases. See your SQL Server documentation for backup instructions.
Warning 
9.
On the Installation Folder screen, specify the location to which you want to install Email Security Log Server and then click Next.
Important 
The full installation path must use only ASCII characters. Do not use extended ASCII or double-byte characters.
10.
On the Pre-Installation Summary screen, review the components to be installed. If they are correct, click Install.
11.
The Installing Websense Email Security screen appears, as components are being installed.
12.
Wait until the Installation Complete screen appears, and then click Done.


Go to the table of contents Go to the previous page Go to the next page Go to the index
Custom Deployment > Installing Email Security Components